Harvesting Gold: Master Sweet Potato Cultivation for Abundant Yields
Master expert tips and practical techniques to successfully grow sweet potatoes, transforming your garden into a source of delicious, nutritious harvests.

Sweet potatoes (Ipomoea batatas) are a beloved staple across many cultures, celebrated for their versatility, nutritional value, and delightful flavor. For home gardeners, cultivating these vibrant tubers offers immense satisfaction, turning a patch of soil into a generous larder. Far from being a complicated crop, sweet potatoes thrive with a bit of know-how and care, making them an excellent choice for both novice and experienced horticulturists alike. Imagine unearthing your own bounty of these golden treasures, fresh from your backyard – a truly rewarding experience that connects you directly to the earth’s generosity.
Laying the Groundwork: Site Selection and Soil Preparation
Successful sweet potato cultivation begins long before the first slip touches the soil. These warmth-loving plants demand particular conditions to flourish, primarily ample sunlight and well-draining soil. Choose a site in your garden that receives at least 6-8 hours of direct sunlight daily. In regions with intense sun, a little afternoon shade can be beneficial, but generally, more sun means more vigorous growth and larger tubers.
Soil composition is paramount. Sweet potatoes prefer a loose, sandy loam, rich in organic matter, with a slightly acidic to neutral pH (5.8 to 6.5). Heavy clay soils can impede tuber development, resulting in stunted or oddly shaped roots. If your soil is heavy, amend it generously with compost, well-rotted manure, or other organic materials to improve drainage and aeration. Raised beds are an excellent option for gardeners with challenging native soils, providing an ideal environment for root expansion. Consider a soil test to understand your soil’s current nutrient profile and pH, allowing for precise amendments. For guidance on soil health and organic amendments, resources like the Rodale Institute offer valuable insights into sustainable practices.
From Slips to Sprouting: Planting and Early Care
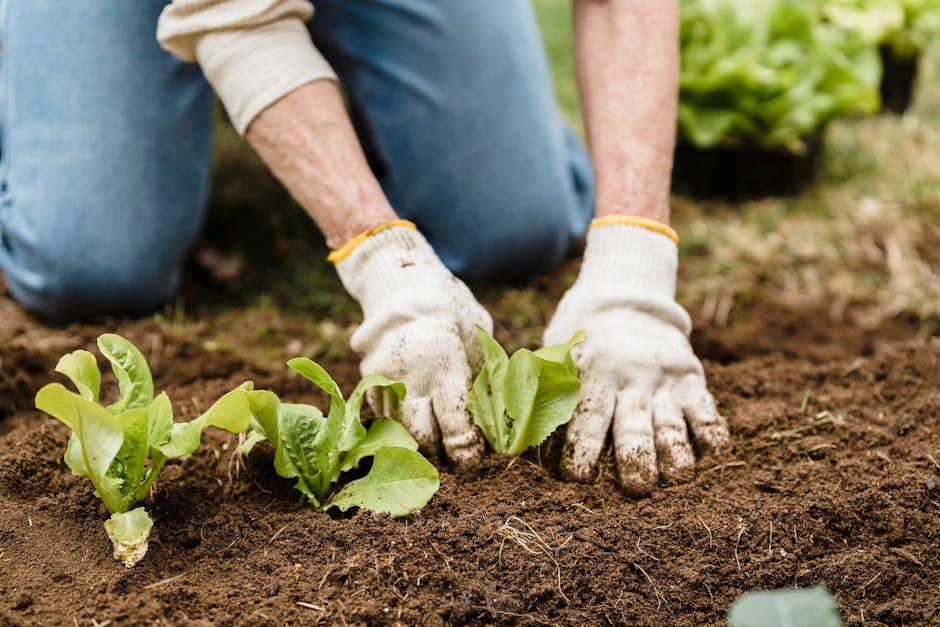
Sweet potatoes are typically grown from ‘slips’ – sprouts that emerge from a mature sweet potato. You can easily start your own slips by placing a healthy sweet potato in a jar of water, half-submerged, in a warm, sunny spot. Once sprouts are 6-8 inches long with developing roots, gently twist them off and plant them. Alternatively, you can purchase disease-free slips from reputable nurseries.
Planting should occur after all danger of frost has passed and soil temperatures consistently reach at least 18°C (65°F). In many warmer climates, this window can extend from late spring into early summer. Space slips about 30-45 cm (12-18 inches) apart in rows that are 90-120 cm (3-4 feet) apart. Plant them deep enough so that at least two nodes (where leaves emerge) are buried, as roots will form from these points. Water thoroughly after planting.
Initial care focuses on consistent moisture and weed control. While sweet potatoes are relatively drought-tolerant once established, young plants benefit from regular watering, especially during dry spells. Apply a layer of organic mulch, such as straw or wood chips, around your plants. Mulching helps retain soil moisture, suppresses weeds, and moderates soil temperature, creating a stable environment for tuber development. Learn more about optimal planting techniques from university extension resources, such as those provided by NC State Extension: https://content.ces.ncsu.edu/sweet-potato-home-garden.
Nurturing Growth: Ongoing Care and Pest Management
As your sweet potato vines spread, they will naturally shade the soil, further suppressing weeds. However, keep an eye out for any persistent weeds, especially in the early stages, as they compete for nutrients and water. Gently remove them by hand to avoid disturbing the developing tubers.
Fertilization needs for sweet potatoes are moderate. They generally prefer less nitrogen and more potassium and phosphorus, which encourage root development rather than excessive foliage. An all-purpose organic fertilizer with a lower first number (e.g., 5-10-10) can be applied once the plants are established, or simply rely on nutrient-rich compost added during soil preparation. Avoid high-nitrogen fertilizers, which will produce lush vines but small tubers.
Sweet potatoes are generally hardy, but like all crops, they can face pest and disease challenges. Common pests include the sweet potato weevil, wireworms, and flea beetles. Implement organic pest management strategies such as crop rotation, companion planting, and encouraging beneficial insects. Inspect your plants regularly for any signs of trouble. For disease prevention, ensure good air circulation, avoid overwatering, and always use disease-free slips. The Royal Horticultural Society offers excellent general advice on vegetable health and pest control: https://www.rhs.org.uk/vegetables/sweet-potatoes/grow-your-own.
The Sweet Reward: Harvesting and Storage
One of the most exciting aspects of growing sweet potatoes is the harvest! Tubers are typically ready for harvest 90-120 days after planting, depending on the variety and growing conditions. Look for signs such as the yellowing of leaves and a slight decline in vine vigor. It’s crucial to harvest before the first hard frost, as cold soil can damage the tubers. In warmer climates, you might have a longer harvest window, but aim to dig them up before heavy rains or prolonged cold spells.
To harvest, carefully loosen the soil around the plant with a garden fork, starting about 30 cm (1 foot) away from the main stem to avoid puncturing the tubers. Gently lift the entire plant, brushing off excess soil. Handle the sweet potatoes with care, as their skins are delicate at this stage.
After harvesting, sweet potatoes benefit from a process called ‘curing.’ This involves keeping them in a warm, humid environment (around 29-32°C / 85-90°F with 85-90% humidity) for 5-10 days. Curing allows the skins to toughen, heals any minor wounds, and converts starches into sugars, enhancing their flavor and extending their storage life. After curing, store them in a cool, dark, well-ventilated place (13-16°C / 55-60°F), where they can last for several months. For detailed curing and storage instructions, Purdue Extension provides comprehensive guides: https://www.purdue.edu/hla/sites/extension-horticulture/sweet-potato/.
Cultivating sweet potatoes is a deeply satisfying journey from slip to table. With thoughtful site selection, diligent care, and proper harvesting techniques, you can enjoy a bountiful harvest of these delicious and nutritious tubers. Embrace the process, connect with your garden, and savor the unique flavor of homegrown sweet potatoes. Happy gardening!
Related Articles
Integrated Management of Plant-Parasitic Nematodes in Lettuce Crops
Strategies for nematode control in lettuce: rotation, varietal resistance, soil conditioning, solarization, and biological control.

Rain Gardens: Urban Bioengineering for Sustainable Stormwater Management
Nature-based solutions to mitigate floods and improve water quality through infiltration and phytoremediation in urban settings.

Urban Carrot Cultivation: Substrate, Irrigation, and Health for Quality Roots
Enhanced strategies for home gardens: substrate preparation, water management, and pest control in carrot cultivation.
Continuous Lettuce Cultivation: Varietal Selection, Substrates, and Seasonal Management
Strategies for constant lettuce production: cultivar selection, ideal substrates, and seasonal management techniques.